이 글은 예전 버전 certbot을 기준으로 작성되었습니다. certbot이 업데이트 되면서 nginx 플러그인이 베타를 벗어나 자동 설정이 가능하게 되었습니다. 자세한 정보는 certbot 홈페이지를 참고해주세요.
블로그에 HTTPS 붙여야지 붙여야지 계속 말만 하면서 안 붙이고 있었는데, 연휴를 맞아 실행하게 되었습니다. 이 글은 NGINX 위에서 직접 호스팅하는 WordPress 블로그에 Let’s Encrypt 인증서를 적용하는 튜토리얼입니다.
1. Certbot으로 인증서 받아오기
Let’s Encrypt는 인증 기관(Certificate Authority, CA) 중 하나입니다. Self-signed 인증서를 이용해 HTTPS를 구현할 수도 있습니다만 HTTPS를 제대로 지원하려면 인증 기관에서 발급 받은 인증서가 필요합니다. 대부분의 인증 기관이 인증서를 유료로 발급해주는데 반해, Let’s Encrypt는 무료로 갱신 가능한 90일짜리 인증서를 발급해준다는 장점이 있습니다. Let’s Encrypt는 인증서를 발급할 때 ACME 프로토콜을 사용하는데, Certbot은 다양한 ACME 클라이언트 중 Let’s Encrypt에서 공식적으로 추천하는 클라이언트입니다.
먼저 Certbot을 설치하고 디펜던시 설치를 위해 설치 후 한 번 실행해 줍시다(루트 권한이 필요합니다). 글 작성일을 기준으로 아직 NGINX auto-config 기능이 기본 클라이언트에 포함되어 있지 않기 때문에 실행 결과 마지막에 관련된 에러 메시지가 뜰텐데, 큰 문제가 아니니 걱정하지 않으셔도 됩니다.
$ cd /usr/local/sbin
$ sudo wget https://dl.eff.org/certbot-auto
$ sudo chmod a+x certbot-auto
$ certbot-auto
다음 단계는 설치된 Certbot으로 인증서를 받아오는 것입니다. Certbot은 플러그인 방식으로 동작하며, $ certbot-auto [SUBCOMMAND] --{plugin name}처럼 실행하면 해당 플러그인 모드로 실행됩니다. WordPress 블로그의 경우 보통 정적 파일 serving이 세팅되어 있기 때문에, webroot 플러그인을 사용하는 것을 추천드립니다. 다른 플러그인을 사용하는 경우 여기를 참고하시면 됩니다.
webroot 플러그인은 certonly 모드로 동작시켜야 합니다. -w 옵션 뒤에는 Top-level 디렉토리(WordPress 설치 경로)를 넣고, -d 옵션 뒤에 Host 주소를 넣으면 됩니다. 제 경우에는 qwaz.io, blog.qwaz.io에 적용되는 인증서를 얻기 위해 $ certbot-auto certonly --webroot -w /home/qwaz/blog/www -d qwaz.io -d blog.qwaz.io 명령을 실행했습니다.
webroot 플러그인은 Top-level 디렉토리에 .well-known/acme-challene/{HASH} 파일을 자동으로 생성해 해당 서버에 대한 소유 권한을 확인합니다. 인증 후에는 자동으로 삭제까지 이루어집니다. 프롬프트에 이메일 주소를 입력하고 약관에 동의하면 verification이 이루어지고, /etc/letsencrypt/live/{domain}/에 인증서가 저장됩니다. 또한, 이후 renewal을 위한 계정 정보 등도 /etc/letsencrypt에 함께 저장되며 주기적인 백업을 추천하는 안내 메시지를 보실 수 있습니다.
인증서 디렉토리에 가서 확인하시면 cert.pem, chain.pem, fullchain.pem, privkey.pem 총 네 가지 파일이 생성된 것을 확인하실 수 있을 겁니다. 마지막으로, $ openssl dhparam -out dhparam.pem 2048 명령어를 이용해 디피-헬만 그룹을 생성해 저장합니다. 시간이 좀 걸리니 천천히 기다리셔야 합니다.
인증서 갱신은 $ cerbot-auto renew 명령으로 가능하며, 인증서 유효기간이 90일인 것을 염두에 두고 주기적으로 실행하시면 됩니다. crontab 등의 유틸리티를 이용해 자동 갱신을 설정하실 수도 있습니다.
2. NGINX에 HTTPS 적용하기
/etc/nginx/sites-enabled 디렉토리에서 HTTPS를 지원하도록 서버 설정을 바꾸어 주어야 합니다. HTTPS를 적용하기 이전 제 블로그 conf 파일은 다음과 같습니다.
# configuration of the server
server {
        # the port your site will be served on
        listen 80;

        # the domain name it will serve for
        server_name     blog.qwaz.io;
        charset         utf-8;

        root /home/qwaz/blog/www;
        index index.php;

        location = /favicon.ico {
                log_not_found off;
                access_log off;
        }

        location = /robots.txt {
                allow all;
                log_not_found off;
                access_log off;
        }

        access_log      /home/qwaz/blog/log/access.log;
        error_log       /home/qwaz/blog/log/error.log;

        client_max_body_size 10M;

        location / {
                try_files $uri $uri/ /index.php?$args;
        }

        location ~ \.php$ {
                include fastcgi.conf;
                fastcgi_intercept_errors on;
                fastcgi_pass unix:/var/run/php5-fpm.sock;
        }

        location ~* \.(js|css|png|jpg|jpeg|gif|ico)$ {
                expires max;
                log_not_found off;
        }
}
Mozilla SSL Configuration Generator의 설정 파일을 기본으로 다음과 같이 수정했습니다. NGINX은 1.10.2 버전, OpenSSL은 1.0.1f 버전을 사용중입니다. NGINX 버전 확인은 $ nginx -v, OpenSSL 버전 확인은 $ openssl version명령을 사용하시면 됩니다.
server {
    listen 80;
    listen [::]:80;

    server_name     blog.qwaz.io;

    # Redirect all HTTP requests to HTTPS with a 301 Moved Permanently response.
    return 301 https://$host$request_uri;
}

server {
    listen 443 ssl http2;
    listen [::]:443 ssl http2;

    # the domain name it will serve for
    server_name     blog.qwaz.io;
    charset         utf-8;

    # certs sent to the client in SERVER HELLO are concatenated in ssl_certificate
    ssl_certificate /etc/letsencrypt/live/qwaz.io/fullchain.pem;
    ssl_certificate_key /etc/letsencrypt/live/qwaz.io/privkey.pem;
    ssl_session_timeout 1d;
    ssl_session_cache shared:SSL:50m;
    ssl_session_tickets off;

    # Diffie-Hellman parameter for DHE ciphersuites, recommended 2048 bits
    ssl_dhparam /etc/letsencrypt/live/qwaz.io/dhparam.pem;

    # intermediate configuration. tweak to your needs.
    ssl_protocols TLSv1 TLSv1.1 TLSv1.2;
    ssl_ciphers 'ECDHE-ECDSA-CHACHA20-POLY1305:ECDHE-RSA-CHACHA20-POLY1305:ECDHE-ECDSA-AES128-GCM-SHA256:ECDHE-RSA-AES128-GCM-SHA256:ECDHE-ECDSA-AES256-GCM-SHA384:ECDHE-RSA-AES256-GCM-SHA384:DHE-RSA-AES128-GCM-SHA256:DHE-RSA-AES256-GCM-SHA384:ECDHE-ECDSA-AES128-SHA256:ECDHE-RSA-AES128-SHA256:ECDHE-ECDSA-AES128-SHA:ECDHE-RSA-AES256-SHA384:ECDHE-RSA-AES128-SHA:ECDHE-ECDSA-AES256-SHA384:ECDHE-ECDSA-AES256-SHA:ECDHE-RSA-AES256-SHA:DHE-RSA-AES128-SHA256:DHE-RSA-AES128-SHA:DHE-RSA-AES256-SHA256:DHE-RSA-AES256-SHA:ECDHE-ECDSA-DES-CBC3-SHA:ECDHE-RSA-DES-CBC3-SHA:EDH-RSA-DES-CBC3-SHA:AES128-GCM-SHA256:AES256-GCM-SHA384:AES128-SHA256:AES256-SHA256:AES128-SHA:AES256-SHA:DES-CBC3-SHA:!DSS';
    ssl_prefer_server_ciphers on;

    # HSTS (ngx_http_headers_module is required) (15768000 seconds = 6 months)
    add_header Strict-Transport-Security max-age=15768000;

    # OCSP Stapling ---
    # fetch OCSP records from URL in ssl_certificate and cache them
    ssl_stapling on;
    ssl_stapling_verify on;

    ## verify chain of trust of OCSP response using Root CA and Intermediate certs
    ssl_trusted_certificate /etc/letsencrypt/live/qwaz.io/chain.pem;

    resolver 8.8.8.8 8.8.4.4 valid=86400;
    resolver_timeout 5s;

    root /home/qwaz/blog/www;
    index index.php;

    location = /favicon.ico {
        log_not_found off;
        access_log off;
    }

    location = /robots.txt {
        allow all;
        log_not_found off;
        access_log off;
    }

    access_log      /home/qwaz/blog/log/access.log;
    error_log       /home/qwaz/blog/log/error.log;

    client_max_body_size 10M;

    location / {
        try_files $uri $uri/ /index.php?$args;
    }

    location ~ \.php$ {
        include fastcgi.conf;
        fastcgi_intercept_errors on;
        fastcgi_pass unix:/var/run/php5-fpm.sock;
    }

    location ~* \.(js|css|png|jpg|jpeg|gif|ico)$ {
        expires max;
        log_not_found off;
    }
}
conf 파일을 저장한 후, $ sudo service nginx restart로 NGINX를 재시작합니다. 설정 파일을 검증하려면 $ nginx -t를 이용해 문제가 있는지 확인하실 수 있습니다.
3. WordPress 설정 변경
이제 http로 접속을 시도하는 경우 https로 리디렉팅 되는 것을 확인하실 수 있을 겁니다. 사소한 남은 변경사항들을 적용합시다.
- WordPress의
설정 > 일반에서 WordPress 주소와 사이트 주소를 http에서 https로 변경합니다.

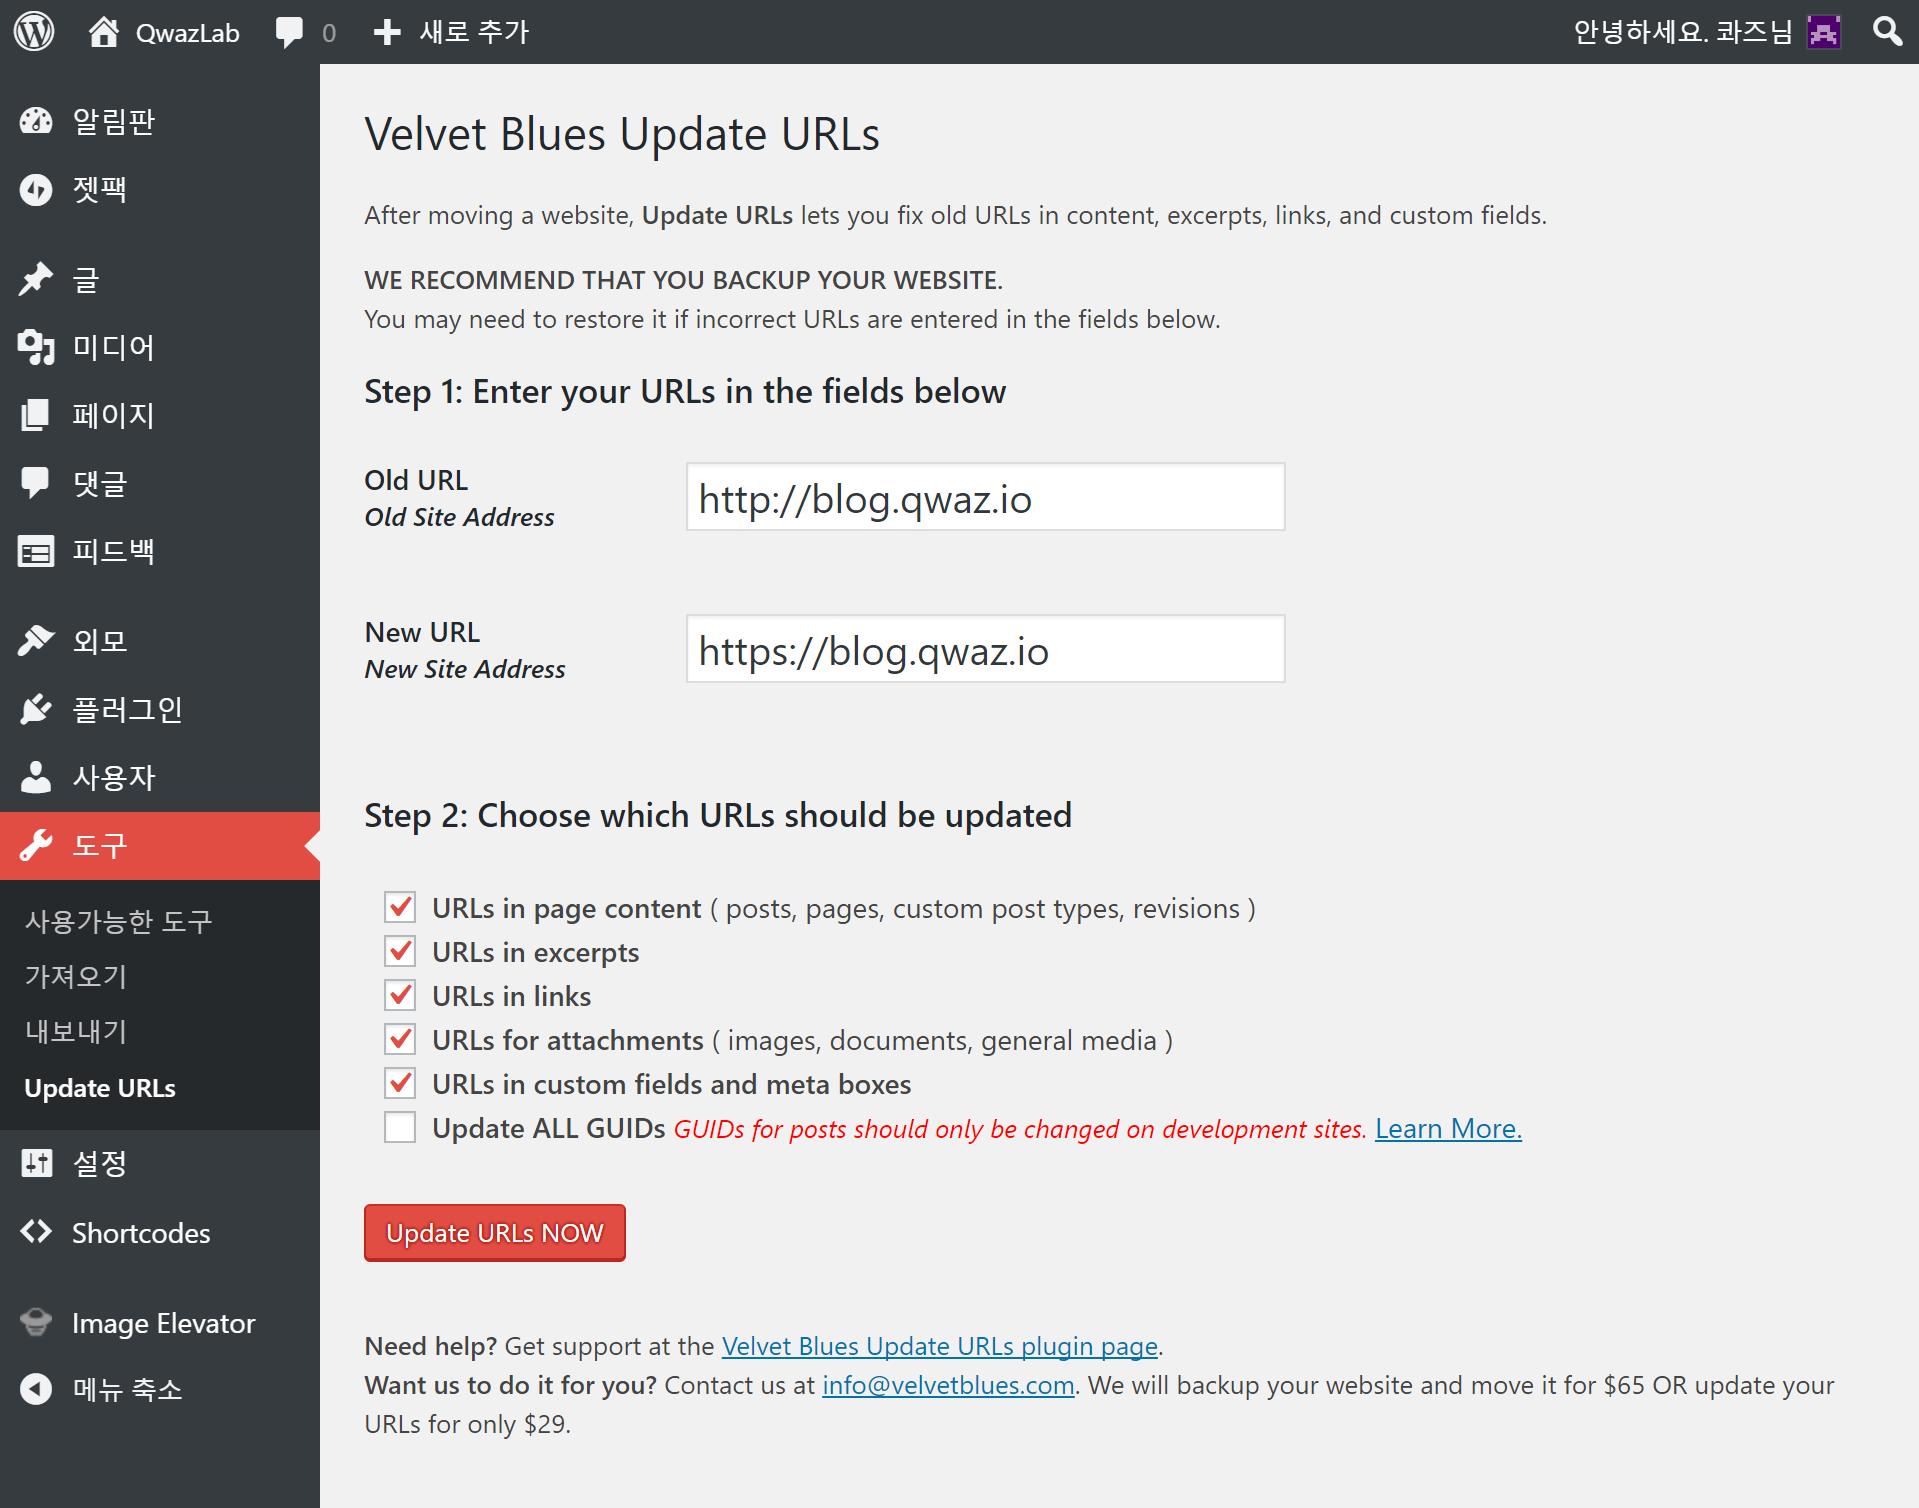
- 기존 글에 있던 http 링크들을 https로 업데이트 합니다. 저는 Velvet Blues Update URLs라는 플러그인을 이용했습니다.

이제 블로그에 들어가시면 기분 좋은 자물쇠 마크를 확인하실 수 있습니다!
참고한 링크
Let’s Encrypt – Getting Started
Certbot HowTo
Outsider’s Dev Story
Digital Ocean 튜토리얼