Attack

Mic Check

The description contains the flag.

Flag: SCTF{Welcome_to_SCTF2017_haha}

Readflag

When we execute the given file, the message says that the sum of the elements in the list should be 10. We can modify dump.py file to change the transmitted Python object. However, even if we send a list which satisfies the requirement, we cannot get the flag.

If we send malformed data, we can get the server’s file name test.py from the error log. The server unpickles our object, which leads to an arbitrary code execution. It has filtering on some system calls, but open and read is not filtered. We can get the flag by reading test.py source code.

code

Flag: SCTF{3a5y_e4zy_p1ckl1ng}

Letter To Me

  • Stage 1 – Get the php source file

We can get the source files using PHP local file inclusion vulnerability.

Accessing http://lettertome.eatpwnnosleep.com/?page=php://filter/convert.base64-encode/resource=?? gives us base64 encoded ??.php file.

  • Stage 2 – Login with remote database

The login part uses mysql_real_escape_string, so we cannot perform SQL Injection. However, in index.php file, $_GET and $_POST are extracted and we can overwrite connection data in conn.php with those attack vector.

We can login by creating fake id/password pair in our own server and accessing http://lettertome.eatpwnnosleep.com/?page=login&servername={SERVER_URL_AND_PORT}&username=pwn&password=pwn&id=admin&pw=admin.

  • Stage 3 – SQL Injection

There is no SQL Injection filtering on resolve_file in note class. Therefore, we want to control the id variable in the note class.

When we send a message in the send page, a note class is created and saved to the database in PHP serialized form. However, before saving, it passes through the filtering routine which replaces some word to $profanity_word repeated to the length of that word. Since $profanity_word is also defined in conn.php , we can overwrite it and control the filtering routine. PHP unserialize function ignores extra data at the end, so we can create malicious serialized note using filtering routine. Then, we can check our SQL injection result in the show page.

SQL Injection on information_schema table gives us the table name and column name for the flag which is LTOM_Fl3g and flag respectively.

code

Flag: SCTF{Enj0y_y0ur_0nly_life}

Labyrinth

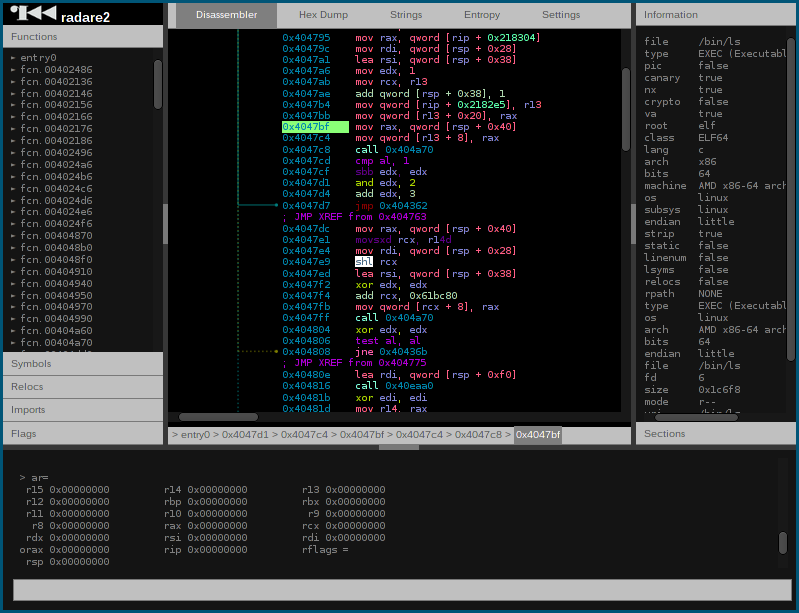
There’s an arbitrary file read vulnerability in the 3rd menu. However, accessing flag or ../flag gives us nothing. Using this vulnerability, we can get the library file from /lib32/libc-2.23.so and read process memory map from /proc/{PROCESS_ID}/maps. I brute-forced the pid during the CTF, but it can be done better by reading /proc/self/maps. With the leaked memory map, we can bypass ASLR and PIE.

When we make the labyrinth, we can leave INFO data in the labyrinth file. If we put a blank character in INFO, only the first part of the INFO will be considered as INFO and characters after that will be considered as the first line of the labyrinth. We can perform a heap overflow because labyrinth load routine only checks the line break and does not check the line length.

Do labyrinth menu first loads a labyrinth file which contains heap overflow, and clearing the labyrinth gives us two size-controlled malloc(name and comment). Therefore, we can utilize the The House of Force technique. I overwrited __free_hook in libc and got a shell.

Flag: SCTF{f0rce_y0u_t0_br34k_th3_h0us3_0f_l4byr1nth}

Defense

Dfa

In the add_node function of auto.c, namelen is defined as unsigned int. If we put length to -1, namelen becomes 4294967295, namelen + 1 will be 0, and we can perform buffer overflow.

Changing the 113th line to if (namelen >= 0x100) gives us the flag.

Flag: SCTF{simple patch tutorial}

Crypto

Toilet

Session json data looks like this {"is_admin": false, "name": "Test"}. We can only control the name part of it.

uHash is calculated in GF(2^{128}) and its value is block_1 \times key ^ {n} + block_2 \times key ^ {n-1} + \cdots + block_n \times key. If we send two requests which have the same nonce and 1 difference of (n-1)th block, xoring two sign gives us the square value of key.

We can perform square root in the field by powering the value by 2^{127} time. This gives us the key of the signer, and we can sign whatever we want.

Creating the fake session with "is_admin": true gives us the flag.

code

Flag: SCTF{Nonce_misuse_in_Wegman_Carter_MAC}

Coding

Asm

We have to automate the parsing of simple add, subtraction, multiply formula image. We can remove character overlap by classifying the RGB characters separately. Then, use the flood fill algorithm to count the number of pixel. The data does not have rotation or size variance, so counting the number of pixel is sufficient to classify each characters.

code

Flag: SCTF{Fun_with_0CR}

Turing Competition

The problem asks us to classify the given tape using turing machine.

  • 1st stage – '0' * n + '1' * m where (n>=0 and m>=0)
  • 2nd stage – '1'*x where (7 * x) % 13 == 1
  • 3rd stage – '0'*n + '1'*n where (n>=0)
  • 4th stage – '0'*p where p is prime

1st~3rd stage is quite easy. We can solve the 4th stage easily by pre-calculating the primes.

code

Flag: SCTF{Turing_Machine_is_v3ry_p0werful1}

Reversing

Easyhaskell

The program converts three bytes of argv[0] to four bytes of output, just like base64. We can do byte-by-byte brute-forcing on argv[0] to find the input which creates =ze=/<fQCGSNVzfDnlk$&?N3oxQp)K/CVzpznK?NeYPx0sz5.

code

Flag: SCTF{D0_U_KNoW_fUnc10N4L_L4n9U4g3?}

들어가며

대회 덕분에 오랜만에 또 문제풀이 코딩을 했다. 전부 풀긴 했는데 시간을 좀 오래 썼다. D에서 코딩 미스가 한 번 있었다. 문제풀이를 좀 쉬었을 때 풀 수 있는 문제 풀은 크게 안 변하는데, 코딩 속도나 풀이를 떠올리는 속도가 좀 줄어든 것 같다는 기분을 느꼈다.

풀이

Problem A. Oversized Pancake Flipper

같은 위치에서 두 번 뒤집는 것은 불필요하므로 왼쪽부터 하나씩 뒤집어보면 된다. O(N^2)으로 Large input이 풀리기 때문에 특별히 자료구조를 쓸 필요도 없다.

A.cpp
#include <cstdio>
#include <cstring>

const int MAX = 1020;

char cake[MAX];
int flipSize;

void solve() {
	int ans = 0;

	int len = strlen(cake);
	for (int i = 0; i <= len-flipSize; i++) {
		if (cake[i] == '-') {
			ans++;
			for (int j = i; j < i+flipSize; j++) {
				cake[j] = cake[j] == '+' ? '-' : '+';
			}
		}
	}

	// final check
	for (int i = len-flipSize+1; i < len; i++) {
		if (cake[i] == '-') {
			puts("IMPOSSIBLE");
			return;
		}
	}

	printf("%d\n", ans);
}

int main() {
	freopen("output.txt", "w", stdout);

	int numCase;
	scanf("%d", &numCase);
	for (int nowCase = 1; nowCase <= numCase; nowCase++) {
		scanf("%s%d", cake, &flipSize);

		printf("Case #%d: ", nowCase);
		solve();
	}

	return 0;
}

Problem B. Tidy Numbers

입력이 tidy한 경우 그대로 출력한다. 입력이 tidy가 아닌 경우 112333445552 형태로 증가하다가 감소하는 지점이 있을텐데, 그 감소하기 직전의 반복되는 부분(여기서는 555)의 첫 숫자를 1 낮추고, 그 뒤쪽을 전부 9로 채우면 된다.

B.cpp
#include <cstdio>
#include <cstring>

const int MAX = 20;

char data[MAX];

void solve() {
	int len = strlen(data);
	int lastIncrease = 0;

	int now;
	for (now = 1; now < len; now++) {
		if (data[now-1] > data[now]) {
			break;
		} else if (data[now-1] < data[now]) {
			lastIncrease = now;
		}
	}

	if (now == len) {
		// monotonic
		puts(data);
	} else {
		char ans[MAX];
		for (int i = 0; i < lastIncrease; i++)
			ans[i] = data[i];
		ans[lastIncrease] = data[lastIncrease]-1;
		for (int i = lastIncrease+1; i < len; i++)
			ans[i] = '9';
		ans[len] = 0;

		for (int i = 0; i < data[i]; i++) {
			if (ans[i] != '0') {
				puts(ans+i);
				return;
			}
		}
	}
}

int main() {
	freopen("output.txt", "w", stdout);

	int numCase;
	scanf("%d", &numCase);
	for (int nowCase = 1; nowCase <= numCase; nowCase++) {
		scanf("%s", data);

		printf("Case #%d: ", nowCase);
		solve();
	}

	return 0;
}

Problem C. Bathroom Stalls

시뮬레이션으로 풀 수 있다. 당연히 한 명씩 넣는 건 아니고, 연속된 구간의 크기와 개수를 이용해 시뮬레이션 하면 지수적으로 수를 줄여나가면서 O(log K)만에 해결 가능하다. 한 가지 관찰이 필요한데, 반씩 줄여 나가는 방식으로 시뮬레이션 하더라도 어떤 시점에서 구간의 크기의 종류가 최대 두 종류라는 사실이다. (n) -> (a, a+1) -> (b, b+1)과 같이 연속한 두 수에 대해서만 관리하면 되고, atomic하게 처리하지 않는 경우에도 최대 네 종류만 관리하면 된다. 탐색 최대 크기가 작아 굳이 Balanced Binary Tree를 쓸 필요는 없었지만 코딩하기 귀찮아서 set을 발라서 해결했다.

C.cpp

#include <cstdio>
#include <set>

typedef long long ll;

ll total, k;

struct state {
	ll n;
	mutable ll count;

	bool operator < (const state &t) const {
		return n < t.n;
	}
};

void insertToSet(std::set < state > &set, ll n, ll count) {
	auto it = set.find(state {n, 0});
	if (it != set.end()) {
		it->count += count;
	} else {
		set.insert(state { n, count });
	}
}

void solve() {
	state start = { total, 1 };

	std::set < state > set;
	set.insert(start);

	while (k) {
		auto it = --set.end();
		if (it->count >= k) {
			printf("%lld %lld\n", it->n/2, (it->n-1)/2);
			return;
		} else {
			k -= it->count;
			insertToSet(set, it->n/2, it->count);
			insertToSet(set, (it->n-1)/2, it->count);
			set.erase(it);
		}
	}
}

int main() {
	freopen("output.txt", "w", stdout);

	int numCase;
	scanf("%d", &numCase);
	for (int nowCase = 1; nowCase <= numCase; nowCase++) {
		scanf("%lld%lld", &total, &k);

		printf("Case #%d: ", nowCase);
		solve();
	}

	return 0;
}

Problem D. Fashion Show

굉장히 마음에 드는 문제였다. 독립된 두 개의 문제를 하나의 문제인 것처럼 섞어서 꼬아 놓았는데, 두 제한조건이 사실 독립이라는 것을 깨달아야 해결할 수 있다. 임의의 같은 가로줄/세로줄에 있는 두 모델을 골랐을 때 둘 중 최소 하나가 +여야 한다는 말은, 바꿔서 말하면 +가 아닌 칸은 같은 가로줄/세로줄에 최대 하나 존재할 수 있다는 말이다. 비숍 배치 문제처럼 가로세로, 대각선 조건에 대해 각각 이분매칭으로 해결한 뒤 겹치는 칸은 o로, 겹치지 않는 칸은 x와 +로 설정해 주면 된다.

D.cpp
#include <cassert>
#include <cstdio>
#include <algorithm>
#include <vector>

using namespace std;

const int MAX = 110;

class BipartiteMatcher {
public:
	const int size;
	int *matched;
	bool *visited;

	vector < int > *edge;

	BipartiteMatcher(int size) : size(size) {
		matched = new int[2*size];
		visited = new bool[2*size];
		edge = new vector < int >[2*size];

		for (int i = 0; i < 2*size; i++) {
			matched[i] = -1;
		}
	}

	~BipartiteMatcher() {
		delete[] matched;
		delete[] visited;
		delete[] edge;
	}

	void addConnection(int a, int b) {
		assert(0 <= a && a < size && 0 <= b && b < size);
		b += size;
		edge[a].push_back(b);
		edge[b].push_back(a);
	}

	vector < pair < int, int > > match() {
		for (int left = 0; left < size; left++) {
			memset(visited, 0, sizeof(bool)*(2*size));
			tryMatch(left);
		}

		vector < pair < int, int > > ret;
		for (int left = 0; left < size; left++) {
			if (matched[left] != -1) {
				ret.push_back(make_pair(left, matched[left]-size));
			}
		}

		return ret;
	}

private: 
	bool tryMatch(int left) {
		for (auto right : edge[left]) {
			if (!visited[right]) {
				visited[right] = 1;
				if (matched[right] < 0 || tryMatch(matched[right])) {
					matched[right] = left;
					matched[left] = right;
					return 1;
				}
			}
		}
		return 0;
	}
};

int gridSize, numModel;
char original[MAX][MAX], ans[MAX][MAX];

void input() {
	scanf("%d%d", &gridSize, &numModel);

	for (int r = 1; r <= gridSize; r++) {
		for (int c = 1; c <= gridSize; c++) {
			original[r][c] = '.';
		}
		original[r][gridSize+1] = 0;
		ans[r][gridSize+1] = 0;
	}

	for (int i = 0; i < numModel; i++) {
		char t[2];
		int r, c;
		scanf("%s%d%d", t, &r, &c);
		original[r][c] = t[0];
	}

	for (int r = 1; r <= gridSize; r++) {
		for (int c = 1; c <= gridSize; c++) {
			ans[r][c] = original[r][c];
		}
	}
}

bool rowCheck[MAX], colCheck[MAX], ldiagCheck[MAX*2], rdiagCheck[MAX*2];

void solve() {
	memset(rowCheck, 0, sizeof(rowCheck));
	memset(colCheck, 0, sizeof(colCheck));
	memset(ldiagCheck, 0, sizeof(ldiagCheck));
	memset(rdiagCheck, 0, sizeof(rdiagCheck));

	for (int r = 1; r <= gridSize; r++) {
		for (int c = 1; c <= gridSize; c++) {
			int rowNum = r-1;
			int colNum = c-1;
			int ldiagNum = r+c-2;
			int rdiagNum = r-c+gridSize-1;
			if (ans[r][c] != '.') {
				if (ans[r][c] != '+') {
					rowCheck[rowNum] = 1;
					colCheck[colNum] = 1;
				}
				if (ans[r][c] != 'x') {
					ldiagCheck[ldiagNum] = 1;
					rdiagCheck[rdiagNum] = 1;
				}
			}
		}
	}

	BipartiteMatcher xy(gridSize), diag(gridSize*2-1);

	for (int r = 1; r <= gridSize; r++) {
		for (int c = 1; c <= gridSize; c++) {
			int rowNum = r-1;
			int colNum = c-1;
			int ldiagNum = r+c-2;
			int rdiagNum = r-c+gridSize-1;

			if (!rowCheck[rowNum] && !colCheck[colNum]) {
				xy.addConnection(rowNum, colNum);
			}
			if (!ldiagCheck[ldiagNum] && !rdiagCheck[rdiagNum]) {
				diag.addConnection(ldiagNum, rdiagNum);
			}
		}
	}

	for (auto p: xy.match()) {
		int rowNum = p.first;
		int colNum = p.second;

		int r = rowNum+1;
		int c = colNum+1;

		if (ans[r][c] == '.') ans[r][c] = 'x';
		else if (ans[r][c] == '+') ans[r][c] = 'o';
	}

	for (auto p: diag.match()) {
		int ldiagNum = p.first;
		int rdiagNum = p.second;

		int r = (ldiagNum+rdiagNum-gridSize+3)/2;
		int c = (ldiagNum-rdiagNum+gridSize+1)/2;
		
		if (ans[r][c] == '.') ans[r][c] = '+';
		else if (ans[r][c] == 'x') ans[r][c] = 'o';
	}

	int score = 0;
	int changed = 0;
	for (int r = 1; r <= gridSize; r++) {
		for (int c = 1; c <= gridSize; c++) {
			if (ans[r][c] != original[r][c]) {
				changed++;
			}
			score += ans[r][c] != '.';
			score += ans[r][c] == 'o';
		}
	}

	printf("%d %d\n", score, changed);

	for (int r = 1; r <= gridSize; r++) {
		for (int c = 1; c <= gridSize; c++) {
			if (ans[r][c] != original[r][c]) {
				printf("%c %d %d\n", ans[r][c], r, c);
			}
		}
	}
}

int main() {
	freopen("output.txt", "w", stdout);

	int numCase;
	scanf("%d", &numCase);
	for (int nowCase = 1; nowCase <= numCase; nowCase++) {
		input();

		printf("Case #%d: ", nowCase);
		solve();
	}

	return 0;
}

창의IT설계는 우리 학과의 간판 과목으로 한 학기 동안 자유 주제로 자신이 “창의IT스럽다”고 생각하는 프로젝트를 진행하는 과목이다. 총 네 단계로 이루어져 있으며 1, 2는 팀으로, 3, 4는 개인으로 진행하며 1, 2에서는 학기별로 주제를 변경하고 3, 4는 한 주제를 1년동안 진행하는 경우가 많다. 나는 자신이 원하는 프로젝트를 마음대로 진행할 수 있다는 자율성과, 학점을 통한 압박으로 마냥 놀지 못하게 하는 강제성이 절묘하게 시너지를 내는 훌륭한 과목이라고 생각한다. 창의IT융합공학과 진학을 선택하면서 고려했던 것도, 어차피 어느 학교에 가든 관심 있는 기술들을 바탕으로 개인 프로젝트를 진행할텐데 창의IT설계 과목 덕분에 주마다 프로젝트 진행 시간도 보장해주고 학점까지 챙겨갈 수 있으니 훨씬 집중하기 쉬운 환경이라고 생각했었다. 장학금 덕분에 신경 쓸 부분이 적어진다는 점도 마음에 들었었다.

사실 앞 문단은 은근슬쩍 끼워 넣은 학과 홍보였고, 본론으로 들어가면 학기 시작이 다가오면서 창의IT설계 3, 4 주제 선정 때문에 고민하고 있다. 교수님들께서는 방학 때 프로젝트를 시작하는 것을 추천하시지만 대부분의 학생들이 학기가 시작하고 프로젝트를 시작한다. 동아리에서 해킹을 하면서 기존 디버거들에 느꼈던 불만을 바탕으로 창의IT설계 3, 4에서는 바이너리 분석 및 디버깅 플랫폼을 주제로 하려고 생각하고 있었다. 시각적으로 좋은 프로젝트와 일상생활과 연관이 있는 프로젝트가 점수를 잘 받는 경향이 있기 때문에 학점 측면에서는 도박성이 있는 주제 선정이지만, 내가 즐겁게 할 수 있으면서 배우는 게 많고, 커리어에도 도움이 될 거라 생각해 이 주제를 일순위로 고려중이었다.

내가 해결하고 싶었던 문제들은 다음과 같다.

  • 디버깅 도구들의 높은 러닝 커브 낮추기
  • 바이너리 분석과 페이로드 제작 환경 통합
  • 중간 언어를 이용한 멀티 아키텍처 디컴파일링
  • codemap, qira, angr 등에 대한 쓰기 쉬운 프론트엔드 제공, 혹은 유사 기능 구현해 통합

주요 고려 대상이었던 건 gdbIDA 두 가지였다. gdb는 CUI에서 기반하는 명령어 암기 및 높은 러닝 커브가 문제라 생각했고, IDA는 높은 가격과 강력한 기능에 비해 아쉬운 UX(Undo 미지원 등)를 개선하고 싶었다. 또한 IDA처럼 실행 환경(주로 Unix)과 분석환경(주로 Windows)이 달라서 생기는 사소한 문제들도 해결할 수 있으면 좋겠다고 생각했다.

하지만 당연히 비슷한 생각을 하는 사람들이 있어서, Binary Ninja나, radare2 같은 2티어 바이너리 분석 툴들에서 이미 비슷한 문제에 대해 고민하고 있었다. 특히 radare2 같은 경우는 해외 커뮤니티에서 super stiff learning curve라는 이야기를 들을 정도로 어디서부터 시작하면 좋을지 모르게 생겼었는데, 최근에 웹 UI를 도입하면서 사용성이 크게 개선된 것처럼 보였다.

Radare2 Web UI

내가 생각하고 있던 구조도 서버에서 바이너리를 실행하고 웹 기반 GUI로 상호작용 하는 것이었는데, radare2의 웹 UI와 특징이 많이 겹쳤다. Binary Ninja는 웹UI는 아니지만 이것도 쓰기 좋은 크로스 플랫폼 UI를 제공하기 때문에 UI 사용성에서는 크게 우위를 보이기 힘들 것이라는 생각이 들었다.

중간 언어를 이용한 디컴파일링 기능은 Hex-Rays 만큼은 당연히 구현하지 못하겠지만, 함수 시그니처 인식, 조건문과 반복문 정도만 구현해도 무료 도구 치고는 경쟁력을 가질 수 있다고 생각했다. 하지만 radare2에서 이미 구현중이었고, Binary Ninja의 로드맵에도 주 목표 중 하나로 제시되어 있었다. 조사하다보니 lldb, gdb, vdb, windbg에 대한 추상화 레이어를 제공하는 Voltron 같은 프로젝트도 있었고, 알아볼수록 기존에 잘 만든 도구들이 많아서 이 주제를 그대로 고르는 것이 맞는지 계속 고민된다. 만약 그대로 이 주제를 선택한다면 완성도는 Binary Ninja Python Prototype 정도를 목표로 하려고 한다. 또한, 기존 도구들에 비해 어떤 차별성을 가질 수 있을지를 더 심도있게 고민해야 할 것으로 보인다.

만약의 경우를 대비해 생각해 두고 있는 다른 주제들도 몇 개 있다. 첫 번째는 1학년 때 MS 이매진컵 주제였던 복셀 기반 월드 에디터 + 비주얼 프로그래밍 언어를 이용한 교육용 프로그래밍 플랫폼 프로젝트다. SangJa라는 이름으로 나갔었는데, JS가 처음이기도 했고 협업에 익숙하지 않아 코드 관리가 조금 아쉬웠지만 주제 자체는 훌륭했다고 생각한다. 지금 생각하고 있는 주제 중 “창의IT”에 제일 적합하다고 생각되기는 한다. 팀 프로젝트라 내가 마음대로 주제를 쓸 수 있는게 아니라서 만약 이 주제를 고르게 된다면 이전에 같이 진행했던 사람들에게 연락해 내가 주제를 다시 써도 되는지 물어보아야 할 것 같다.

두 번째 주제는 안드로이드 매크로다. G매크로류의 매크로 프로그램들은 PC만 지원하는 경우가 많은데, 안드로이드까지 지원을 확장하고 비전 기반 기능들을 추가하려고 생각하고 있다(체력바를 읽는다든지 카드 희귀도를 알아내서 리세마라를 해 준다든지). 이 주제를 하게 되면 본의 아니게 또 OpenCV와 한 학기를 보내게 될 것이다. 이것도 적다보니 오토핫키 안드로이드 열화 카피가 되는 건 아닌지 걱정된다. sl4a 같은 프로젝트도 있고…

원래는 미리 고민해서 개발을 시작하려고 했는데, 연구참여도 하고 동아리도 하다 보니 짧은 방학이 훌쩍 지나가버렸다. 이번 학기에는 기초필수 과목이 끝난 덕분에 학기중 연참을 하면서 창의IT설계와 연구참여 투탑 체제로 프로그래밍 비중이 높은 학기를 보내려고 계획하고 있다.

이 글은 예전 버전 certbot을 기준으로 작성되었습니다. certbot이 업데이트 되면서 nginx 플러그인이 베타를 벗어나 자동 설정이 가능하게 되었습니다. 자세한 정보는 certbot 홈페이지를 참고해주세요.

블로그에 HTTPS 붙여야지 붙여야지 계속 말만 하면서 안 붙이고 있었는데, 연휴를 맞아 실행하게 되었습니다. 이 글은 NGINX 위에서 직접 호스팅하는 WordPress 블로그에 Let’s Encrypt 인증서를 적용하는 튜토리얼입니다.

1. Certbot으로 인증서 받아오기

Let’s Encrypt는 인증 기관(Certificate Authority, CA) 중 하나입니다. Self-signed 인증서를 이용해 HTTPS를 구현할 수도 있습니다만 HTTPS를 제대로 지원하려면 인증 기관에서 발급 받은 인증서가 필요합니다. 대부분의 인증 기관이 인증서를 유료로 발급해주는데 반해, Let’s Encrypt는 무료로 갱신 가능한 90일짜리 인증서를 발급해준다는 장점이 있습니다. Let’s Encrypt는 인증서를 발급할 때 ACME 프로토콜을 사용하는데, Certbot은 다양한 ACME 클라이언트 중 Let’s Encrypt에서 공식적으로 추천하는 클라이언트입니다.

먼저 Certbot을 설치하고 디펜던시 설치를 위해 설치 후 한 번 실행해 줍시다(루트 권한이 필요합니다). 글 작성일을 기준으로 아직 NGINX auto-config 기능이 기본 클라이언트에 포함되어 있지 않기 때문에 실행 결과 마지막에 관련된 에러 메시지가 뜰텐데, 큰 문제가 아니니 걱정하지 않으셔도 됩니다.

$ cd /usr/local/sbin
$ sudo wget https://dl.eff.org/certbot-auto
$ sudo chmod a+x certbot-auto
$ certbot-auto

다음 단계는 설치된 Certbot으로 인증서를 받아오는 것입니다. Certbot은 플러그인 방식으로 동작하며, $ certbot-auto [SUBCOMMAND] --{plugin name}처럼 실행하면 해당 플러그인 모드로 실행됩니다. WordPress 블로그의 경우 보통 정적 파일 serving이 세팅되어 있기 때문에, webroot 플러그인을 사용하는 것을 추천드립니다. 다른 플러그인을 사용하는 경우 여기를 참고하시면 됩니다.

webroot 플러그인은 certonly 모드로 동작시켜야 합니다. -w 옵션 뒤에는 Top-level 디렉토리(WordPress 설치 경로)를 넣고, -d 옵션 뒤에 Host 주소를 넣으면 됩니다. 제 경우에는 qwaz.io, blog.qwaz.io에 적용되는 인증서를 얻기 위해 $ certbot-auto certonly --webroot -w /home/qwaz/blog/www -d qwaz.io -d blog.qwaz.io 명령을 실행했습니다.

webroot 플러그인은 Top-level 디렉토리에 .well-known/acme-challene/{HASH} 파일을 자동으로 생성해 해당 서버에 대한 소유 권한을 확인합니다. 인증 후에는 자동으로 삭제까지 이루어집니다. 프롬프트에 이메일 주소를 입력하고 약관에 동의하면 verification이 이루어지고, /etc/letsencrypt/live/{domain}/에 인증서가 저장됩니다. 또한, 이후 renewal을 위한 계정 정보 등도 /etc/letsencrypt에 함께 저장되며 주기적인 백업을 추천하는 안내 메시지를 보실 수 있습니다.

인증서 디렉토리에 가서 확인하시면 cert.pem, chain.pem, fullchain.pem, privkey.pem 총 네 가지 파일이 생성된 것을 확인하실 수 있을 겁니다. 마지막으로, $ openssl dhparam -out dhparam.pem 2048 명령어를 이용해 디피-헬만 그룹을 생성해 저장합니다. 시간이 좀 걸리니 천천히 기다리셔야 합니다.

인증서 갱신은 $ cerbot-auto renew 명령으로 가능하며, 인증서 유효기간이 90일인 것을 염두에 두고 주기적으로 실행하시면 됩니다. crontab 등의 유틸리티를 이용해 자동 갱신을 설정하실 수도 있습니다.

2. NGINX에 HTTPS 적용하기

/etc/nginx/sites-enabled 디렉토리에서 HTTPS를 지원하도록 서버 설정을 바꾸어 주어야 합니다. HTTPS를 적용하기 이전 제 블로그 conf 파일은 다음과 같습니다.

# configuration of the server
server {
        # the port your site will be served on
        listen 80;

        # the domain name it will serve for
        server_name     blog.qwaz.io;
        charset         utf-8;

        root /home/qwaz/blog/www;
        index index.php;

        location = /favicon.ico {
                log_not_found off;
                access_log off;
        }

        location = /robots.txt {
                allow all;
                log_not_found off;
                access_log off;
        }

        access_log      /home/qwaz/blog/log/access.log;
        error_log       /home/qwaz/blog/log/error.log;

        client_max_body_size 10M;

        location / {
                try_files $uri $uri/ /index.php?$args;
        }

        location ~ \.php$ {
                include fastcgi.conf;
                fastcgi_intercept_errors on;
                fastcgi_pass unix:/var/run/php5-fpm.sock;
        }

        location ~* \.(js|css|png|jpg|jpeg|gif|ico)$ {
                expires max;
                log_not_found off;
        }
}

Mozilla SSL Configuration Generator의 설정 파일을 기본으로 다음과 같이 수정했습니다. NGINX은 1.10.2 버전, OpenSSL은 1.0.1f 버전을 사용중입니다. NGINX 버전 확인은 $ nginx -v, OpenSSL 버전 확인은 $ openssl version명령을 사용하시면 됩니다.

server {
    listen 80;
    listen [::]:80;

    server_name     blog.qwaz.io;

    # Redirect all HTTP requests to HTTPS with a 301 Moved Permanently response.
    return 301 https://$host$request_uri;
}

server {
    listen 443 ssl http2;
    listen [::]:443 ssl http2;

    # the domain name it will serve for
    server_name     blog.qwaz.io;
    charset         utf-8;

    # certs sent to the client in SERVER HELLO are concatenated in ssl_certificate
    ssl_certificate /etc/letsencrypt/live/qwaz.io/fullchain.pem;
    ssl_certificate_key /etc/letsencrypt/live/qwaz.io/privkey.pem;
    ssl_session_timeout 1d;
    ssl_session_cache shared:SSL:50m;
    ssl_session_tickets off;

    # Diffie-Hellman parameter for DHE ciphersuites, recommended 2048 bits
    ssl_dhparam /etc/letsencrypt/live/qwaz.io/dhparam.pem;

    # intermediate configuration. tweak to your needs.
    ssl_protocols TLSv1 TLSv1.1 TLSv1.2;
    ssl_ciphers 'ECDHE-ECDSA-CHACHA20-POLY1305:ECDHE-RSA-CHACHA20-POLY1305:ECDHE-ECDSA-AES128-GCM-SHA256:ECDHE-RSA-AES128-GCM-SHA256:ECDHE-ECDSA-AES256-GCM-SHA384:ECDHE-RSA-AES256-GCM-SHA384:DHE-RSA-AES128-GCM-SHA256:DHE-RSA-AES256-GCM-SHA384:ECDHE-ECDSA-AES128-SHA256:ECDHE-RSA-AES128-SHA256:ECDHE-ECDSA-AES128-SHA:ECDHE-RSA-AES256-SHA384:ECDHE-RSA-AES128-SHA:ECDHE-ECDSA-AES256-SHA384:ECDHE-ECDSA-AES256-SHA:ECDHE-RSA-AES256-SHA:DHE-RSA-AES128-SHA256:DHE-RSA-AES128-SHA:DHE-RSA-AES256-SHA256:DHE-RSA-AES256-SHA:ECDHE-ECDSA-DES-CBC3-SHA:ECDHE-RSA-DES-CBC3-SHA:EDH-RSA-DES-CBC3-SHA:AES128-GCM-SHA256:AES256-GCM-SHA384:AES128-SHA256:AES256-SHA256:AES128-SHA:AES256-SHA:DES-CBC3-SHA:!DSS';
    ssl_prefer_server_ciphers on;

    # HSTS (ngx_http_headers_module is required) (15768000 seconds = 6 months)
    add_header Strict-Transport-Security max-age=15768000;

    # OCSP Stapling ---
    # fetch OCSP records from URL in ssl_certificate and cache them
    ssl_stapling on;
    ssl_stapling_verify on;

    ## verify chain of trust of OCSP response using Root CA and Intermediate certs
    ssl_trusted_certificate /etc/letsencrypt/live/qwaz.io/chain.pem;

    resolver 8.8.8.8 8.8.4.4 valid=86400;
    resolver_timeout 5s;

    root /home/qwaz/blog/www;
    index index.php;

    location = /favicon.ico {
        log_not_found off;
        access_log off;
    }

    location = /robots.txt {
        allow all;
        log_not_found off;
        access_log off;
    }

    access_log      /home/qwaz/blog/log/access.log;
    error_log       /home/qwaz/blog/log/error.log;

    client_max_body_size 10M;

    location / {
        try_files $uri $uri/ /index.php?$args;
    }

    location ~ \.php$ {
        include fastcgi.conf;
        fastcgi_intercept_errors on;
        fastcgi_pass unix:/var/run/php5-fpm.sock;
    }

    location ~* \.(js|css|png|jpg|jpeg|gif|ico)$ {
        expires max;
        log_not_found off;
    }
}

conf 파일을 저장한 후, $ sudo service nginx restart로 NGINX를 재시작합니다. 설정 파일을 검증하려면 $ nginx -t를 이용해 문제가 있는지 확인하실 수 있습니다.

3. WordPress 설정 변경

이제 http로 접속을 시도하는 경우 https로 리디렉팅 되는 것을 확인하실 수 있을 겁니다. 사소한 남은 변경사항들을 적용합시다.

  1. WordPress의 설정 > 일반에서 WordPress 주소와 사이트 주소를 http에서 https로 변경합니다.
    https 설정 페이지
  2. 기존 글에 있던 http 링크들을 https로 업데이트 합니다. 저는 Velvet Blues Update URLs라는 플러그인을 이용했습니다.
    velvet blues update urls capture

이제 블로그에 들어가시면 기분 좋은 자물쇠 마크를 확인하실 수 있습니다!

참고한 링크

Let’s Encrypt – Getting Started
Certbot HowTo
Outsider’s Dev Story
Digital Ocean 튜토리얼